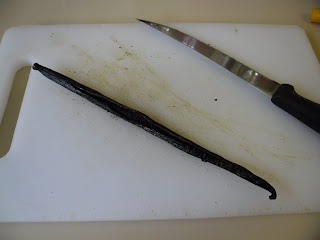
This photo was taken about 5 minutes ago - 2 weeks old. Look how dark it's getting :-)
I did a bit of research before starting and there's a lot of info out there and a lot of advice. Here are some links to sources that I found relevant.
http://sugarcrafter.net/2010/01/02/vanilla-extract/
http://50.56.117.209/diy-vanilla-extract-favors/
http://www.weddingbee.com/2009/10/20/diy-vanilla-extract-and-vanilla-sugar-shower-favors/
http://theitaliandishblog.com/imported-20090913150324/2009/12/26/make-your-own-vanilla-extract.html
http://www.vanillareview.com/make-vanilla-extract/
So taking key info from these posts I've come up with this.
- You need 1 vanilla been pod per 1/3 cup vodka
- I don't think it really matters whether you use A or B grade beans as long as you soak them for long enough.
- Don't leave the beans in there for longer than 12 months as their quality fails, but you can replace them after that with fresh beans.
- Cutting the pod is essential, however chopping isn't.
- You can top up your essence with more vodka if you have a bean in there.
- Don't let the beans sit higher than the liquid as mold can develop on them.
- You essence will be ready once the vodka smell is replaced by the vanilla scent. (usually 3 months)
- Using good quality 70-80 proof vodka is best.
- If you're giving your product as a gift give instructions on the bottle, especially if you put a bean in there.
I gathered all my bits:
Vodka - I have a 1L bottle left over from my 21st with about 1/3 left in the bottle. I haven't touched it in years (since figuring out Vodka was to blame for all the horrific hang overs of my youth ;-P) It's stunning quality too, so a perfect choice.
Beans - My chef helped my out with these after I learned the price in the supermarket. Although I've since learned you can get them through ebay and fairly cheap compared to supermarket options, however it is for bulk amounts.
I began by sterilizing all the equipment to be involved. This helped kill any bacteria in the bottle and stopped the knife, cutting board and funnel from introducing any.
My bottle was tall enough to fit the whole pods in so all I did was slice the beans down the middle and opened them, exposing that delicious 'caviar'. My hands smelled like vanilla for a day after that!
Once all the pods were in I used a small funnel and slowly poured in the vodka.
And Ta Dah!!! The finished product :-) Next I put it in the back of the cupboard to rest in the dark and gave it a twirl every day for a week.
One week in and the colour is kicking in! Also some of the lovely caviar has fallen to the bottom. The liquid had dropped a bit exposing the tops of the pods so I added a dash more vodka to cover them again.
The vanilla smell is creeping through and I'm so excited to give it a go as soon as it's ready! I'm also preparing to make some larger batches for gifts. I even found some 250ml swing top glass bottles for $2 near my work, SCORE!! :-)
Now tell me is there anything you're making now instead of buying? I love that this way you can avoid added chemicals etc. I'm thinking next I might try some make-up remover wipes I also saw on pinterest.... ;-P xxoo
Roxanne


No comments:
Post a Comment